Agenda
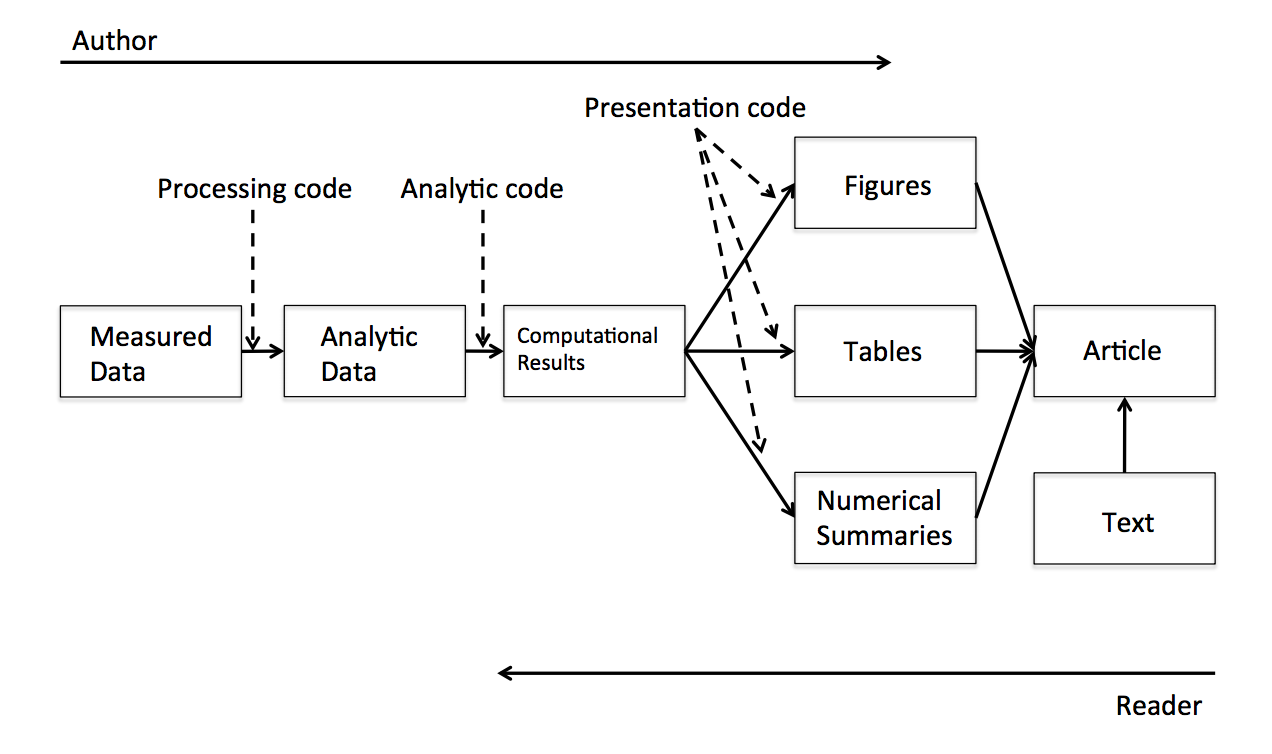
What does data analyst actually do
https://www.coursera.org/course/repdata
What is Markdown
A convenient tool to generate reproducible document.
- Markdown
- Lightweightmarkuplanguage
- Remove HTML tag for higher readibility.
- Inline HTML is avaliable.
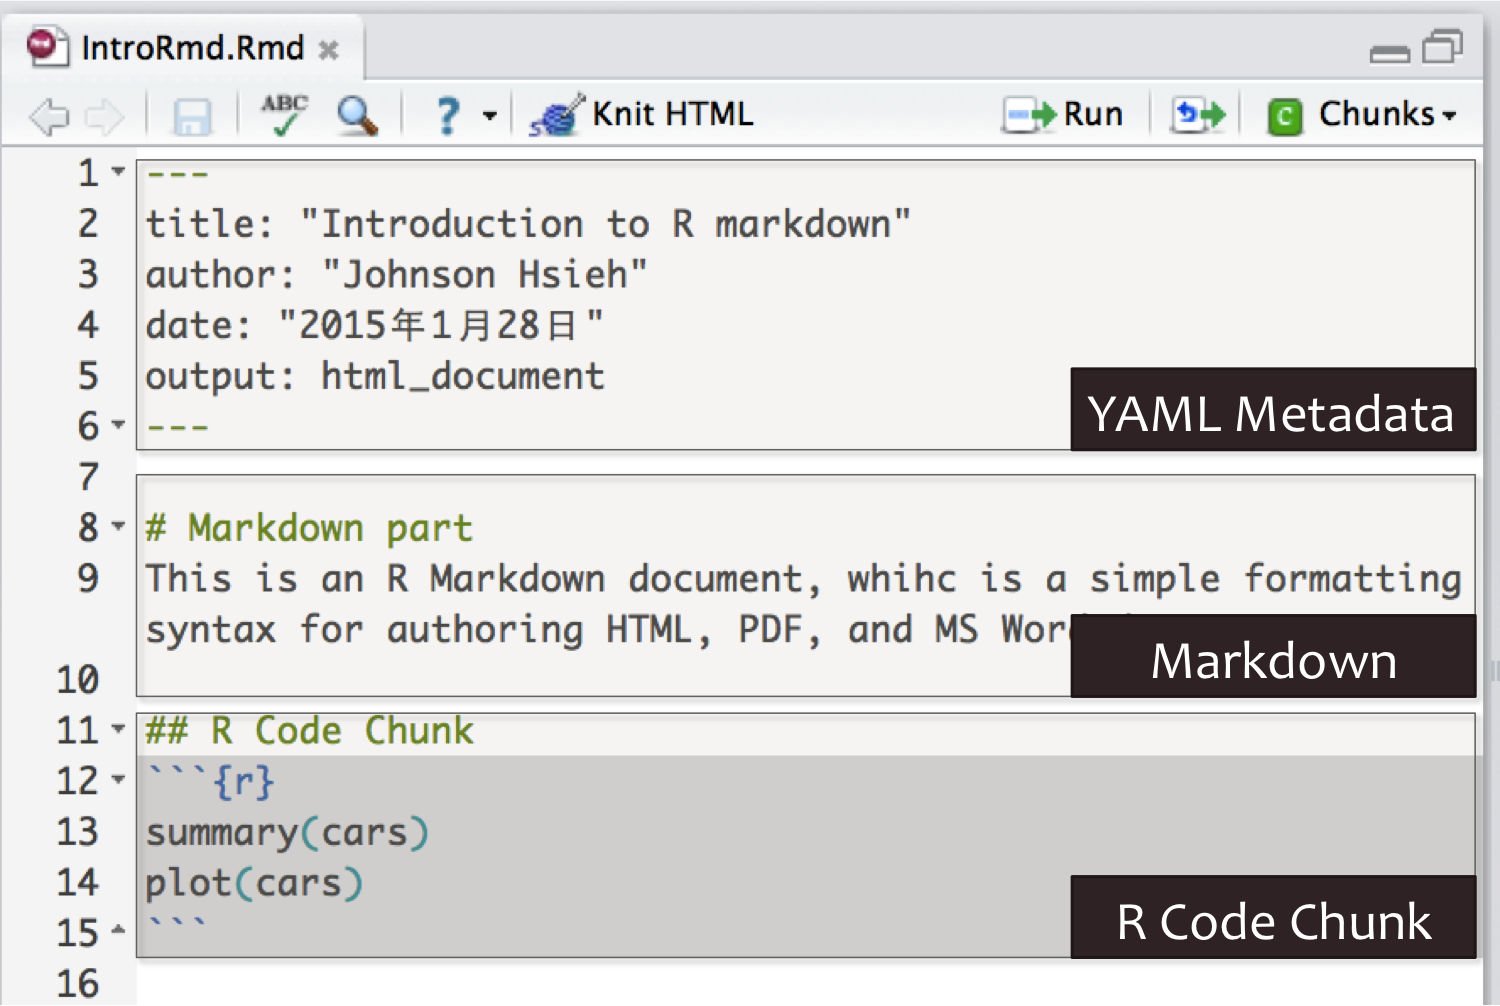
What is RMarkdown
- R markdown
- Markdown + embedded R code chunks
- Rmd -> md -> html(docx, pdf)
Why we need R Markdown

- 教授很有想法,想嘗試新方法
(FK!又要重跑一份) - 老闆說要改流程
(MD!之前貼到簡報上的圖又要重貼一份) - 資料分析做不完
(分析都做不完了,還整理什麼結果!) - 專案報告要呈現
Why we need R Markdown
- 製作reproducible的報告、投影片
- 想寫數學式子好展現自己的專業 \(e=mc^2\)
- 只有一份source code,不需要額外複製圖片到報告中
- 需求更改時,可以動態改變報告內容
- 增加資料分析演算法的可讀性
- IDE? RStudio提供支援
Installation
- 最新版的RStudio已經包含R Markdown功能
- 你也可以透過以下指令安裝R Markdown套件:
install.packages("rmarkdown")
R Markdown 快速導覽
Overview
Markdown
R Code Chunks
Inline R Code and Equations
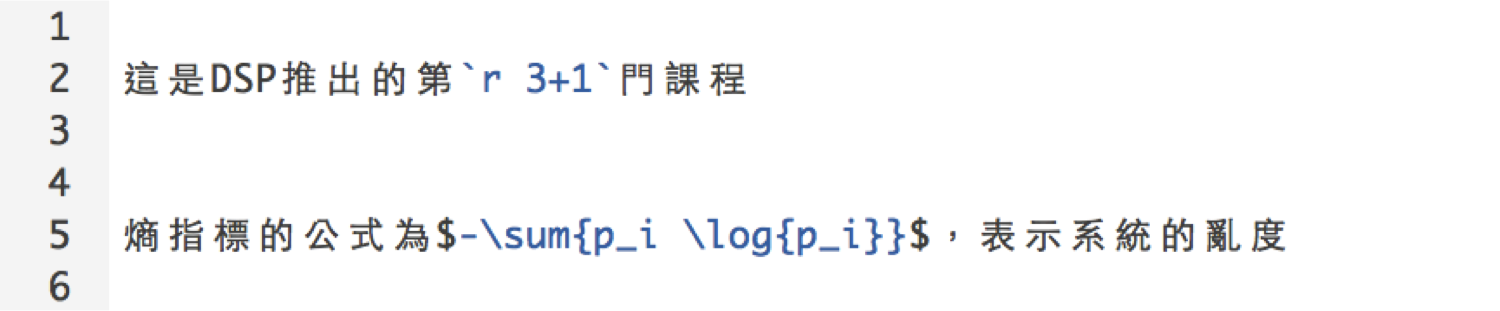
- 利用 `r` 在markdown中插入R程式
- 插入 LaTeX 公式的方法:
- 行內
$ equation $ - 段落
$$ equation $$
- 行內
Rendering Output
- RStudio: "Knit" command (Ctrl+Shift+K)
- Command line: rmarkdown::render function
rmarkdown::render("input.Rmd")
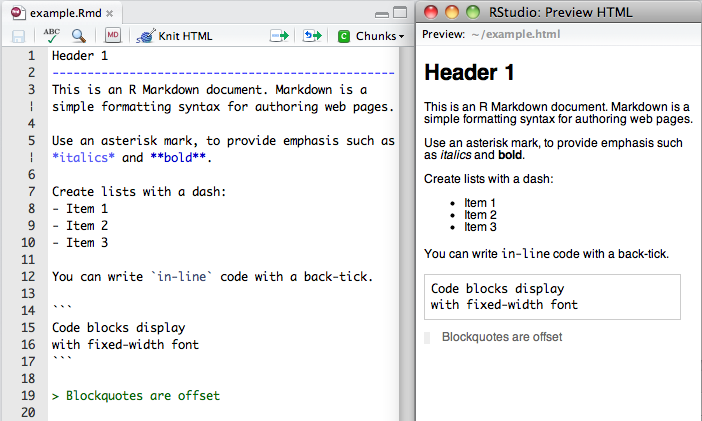
Markdown Basics
Markdown Quick Reference
help (?)可以查閱Markdown語法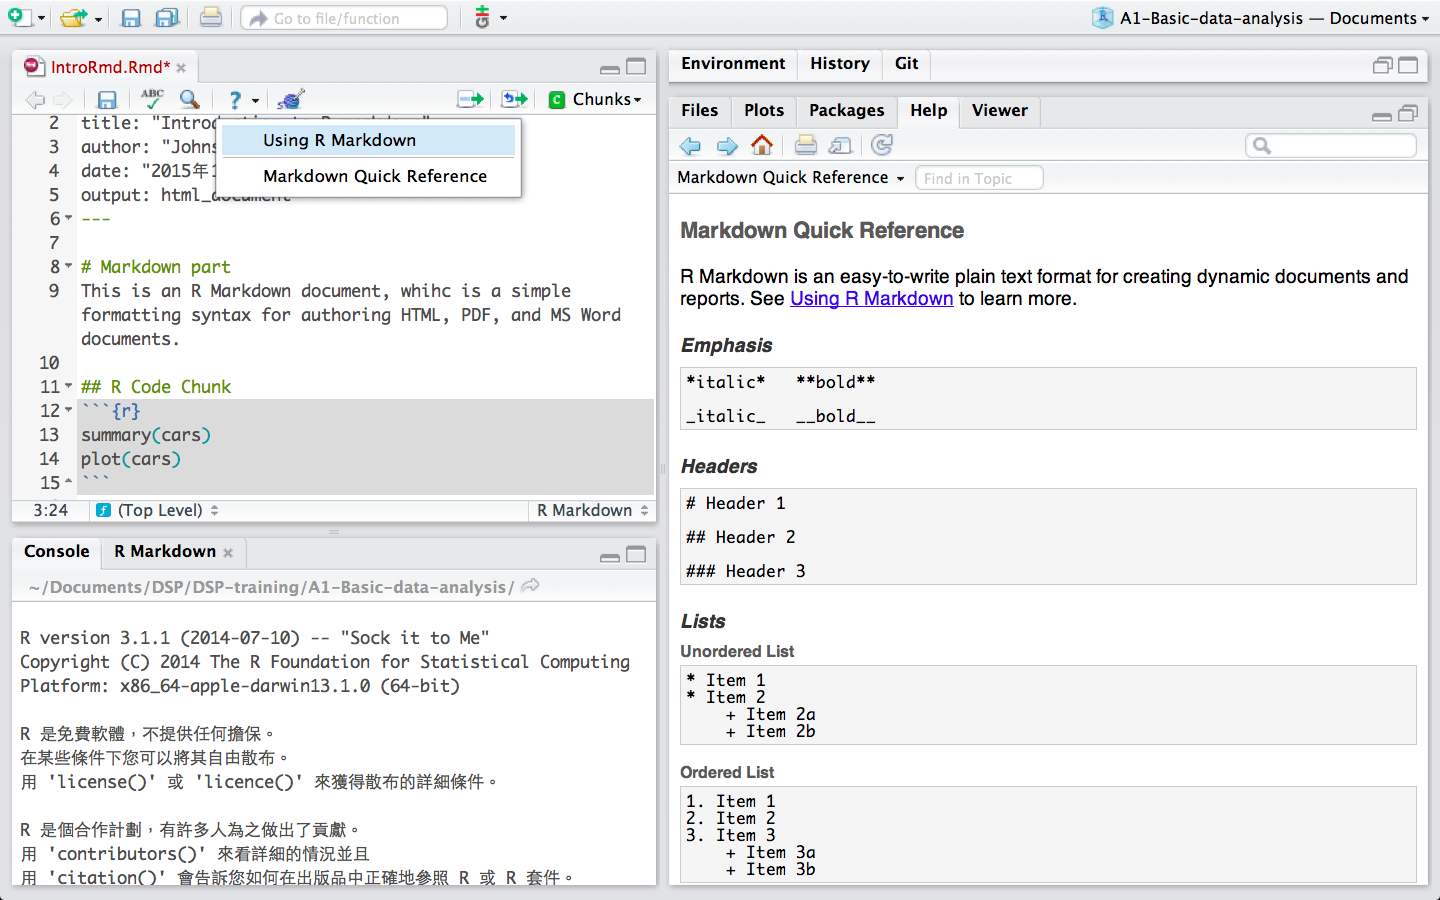
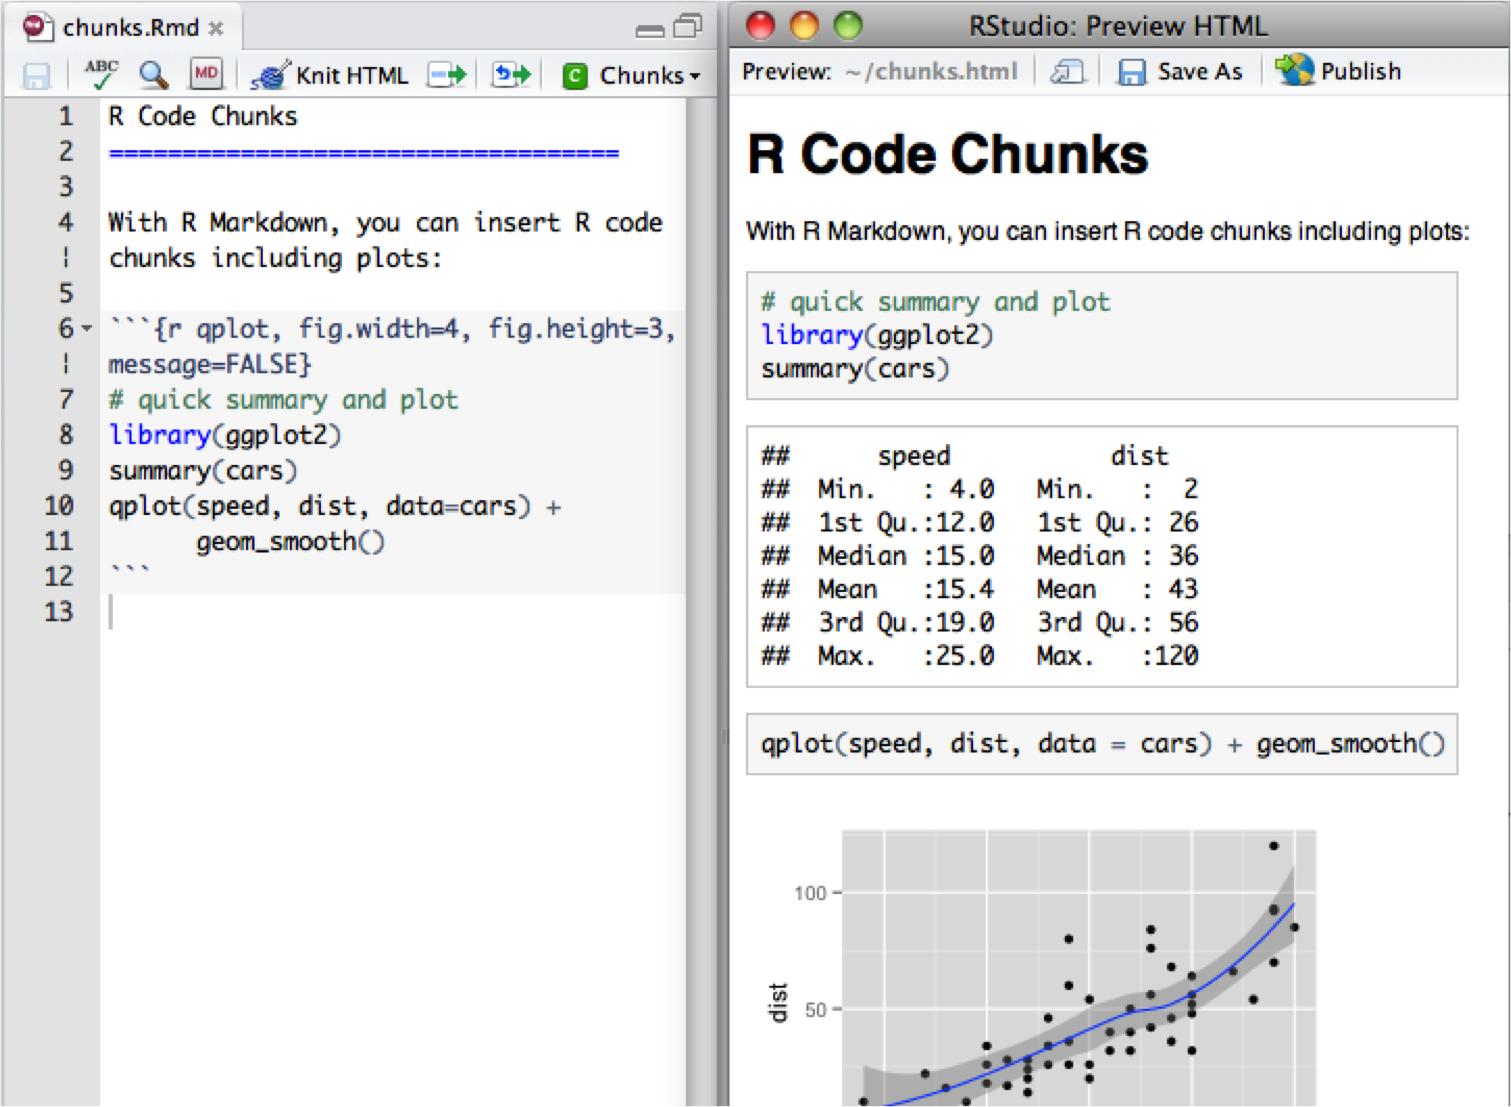
R Code Chunks
Overview
R code will be evaluated and printed
```{r}
summary(cars$dist)
```
summary(cars$dist)
   Min. 1st Qu.  Median    Mean 3rd Qu.    Max.
   2.00   26.00   36.00   42.98   56.00  120.00
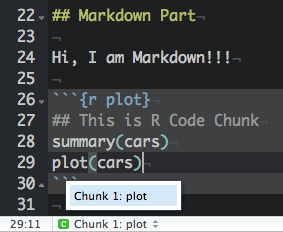
Named R code chunk.
```{r plot}
summary(cars)
plot(cars)
```
- Easy Navigation in RStudio
Basic Chunk Options
echo(TRUE): whether to include R source code in the output fileeval(TRUE): whether to evaluate the code chunkmessage(TRUE): whether to preserve messages emitted by message()include(TRUE): if include=FALSE, nothing will be written into the output document, but the code is still evaluated and plot files are generatedwarning(TRUE): whether to preserve warnings in the outputcomment("##"): set to comment notation
Basic Chunk Options(cont.)
Set global chunk options:
knitr::opts_chunk$set()
Exercise
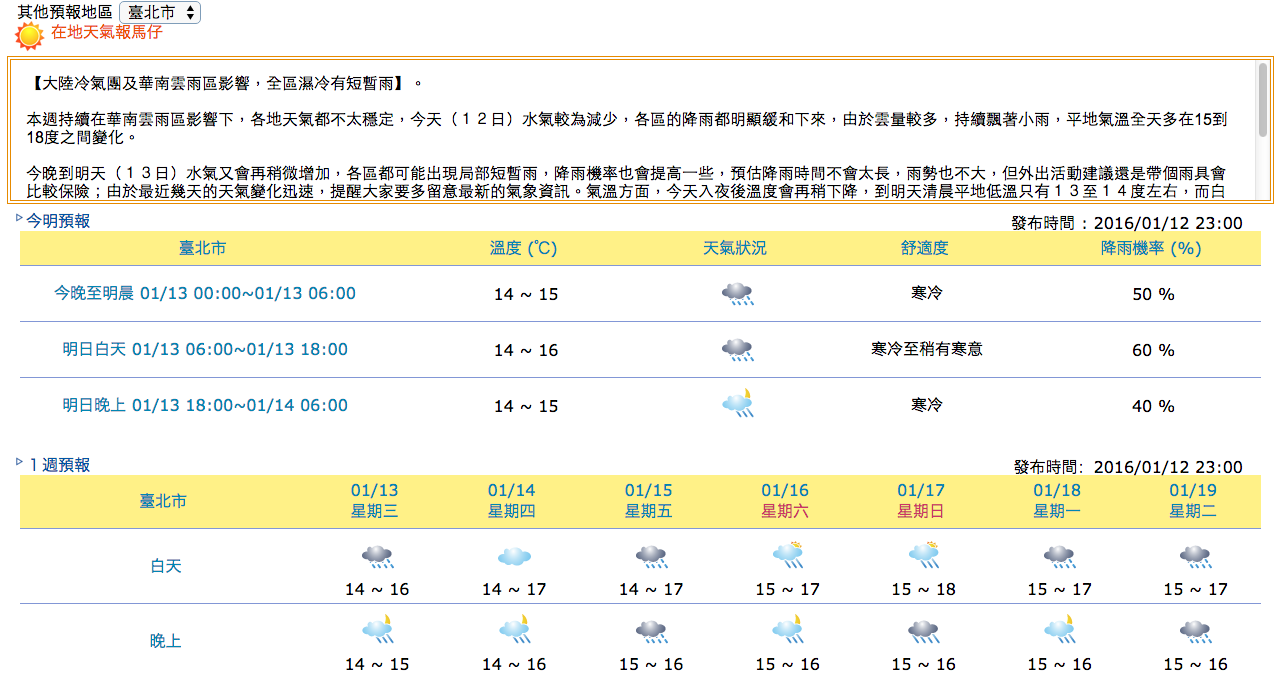
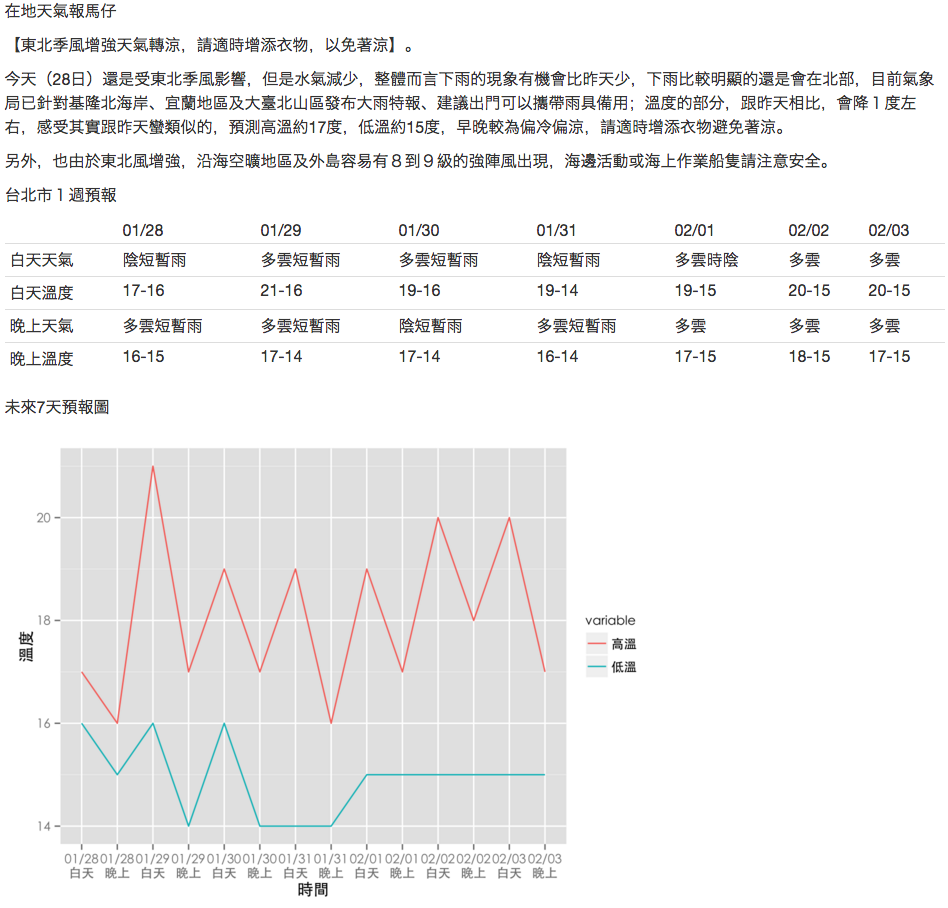
利用R Markdown 製作《一周天氣預報》書面報告。
Exercise: Original:
Exercise: After:
Exercise Q1
利用R Markdown 製作《一周天氣預報》書面報告。
- 計算01/28日當日的最高溫與最低溫度
# Hint:
# 1. 下載weather-utf8.csv到自己的電腦上
# 2. 在R chunk中,利用read.csv()讀取檔案進行分析
  #  Windows: read.csv(,fileEncoding="UTF-8")
# 3. 找出01/28當日最高溫 max()
# 4. 找出01/28當日最低溫 min()
# 5. use inline R chunk `r max(...)`
Exercise A1
利用R Markdown 製作《一周天氣預報》書面報告。
- 計算01/28日當日的最高溫與最低溫度
# Hint for Linu& Mac:
dat <- read.csv("data/weather-utf8.csv")
max(dat[1:2, 4:5])
min(dat[1:2, 4:5])
# 預測高溫約`r max(dat[1:2,4:5])`度,低溫約`r min(dat[1:2,4:5])`度
# Hint for Windows:
dat <- read.csv("data/weather-utf8.csv", fileEncoding="UTF-8")
max(dat[1:2, 4:5])
min(dat[1:2, 4:5])
# 預測高溫約`r max(dat[1:2,4:5])`度,低溫約`r min(dat[1:2,4:5])`度
Table Output
- Print data directly:
print(head(women))
  height weight
1     58    115
2     59    117
3     60    120
4     61    123
5     62    126
6     63    129
Table Output (cont.)
Set results='asis' to write raw results from R into the output document
- Using
knitr::kable:- Set
results='asis'to write raw results from R into the output document
```{r, results='asis'}
  knitr::kable(women)
  ```
- Set
Table Output (cont.)
| height | weight |
|---|---|
| 58 | 115 |
| 59 | 117 |
| 60 | 120 |
| 61 | 123 |
| 62 | 126 |
| 63 | 129 |
Exercise Q2
利用R Markdown 製作《一周天氣預報》書面報告。
- 製作未來七天天氣預報表
# Hint:
# 你可能需要dplyr套件
# 可以先用filter把白天、晚上分開處理
# 利用 paste(低溫,高溫,sep="-") 來製作溫度區間, i.e. 16-17
# 利用colnames, rownames來對整理好的資料表的行與列命名
Exercise A2
利用R Markdown 製作《一周天氣預報》書面報告。
- 製作未來七天天氣預報表
day1 <- filter(dat, 早晚=="白天")
day2 <- mutate(day1, 溫度=paste(高溫,低溫,sep="-"))
day3 <- select(day2, 天氣, 溫度)

night1 <- filter(dat, 早晚=="晚上")
night2 <- mutate(night1, 溫度=paste(高溫,低溫,sep="-"))
night3 <- select(night2, 天氣, 溫度)

out <- data.frame(t(bind_cols(day3, night3)))
colnames(out) <- day1$日期
rownames(out) <- c("白天天氣","白天溫度","晚上天氣","晚上溫度")
Exercise A2 (conti.)
利用R Markdown 製作《一周天氣預報》書面報告。
- 製作未來七天天氣預報表
```{r results='asis', echo=FALSE}
knitr::kable(out)
```
knitr::kable(out)
Exercise A2 (conti.)
| 01/28 | 01/29 | 01/30 | 01/31 | 02/01 | 02/02 | 02/03 | |
|---|---|---|---|---|---|---|---|
| 白天天氣 | 陰短暫雨 | 多雲短暫雨 | 多雲短暫雨 | 陰短暫雨 | 多雲時陰 | 多雲 | 多雲 |
| 白天溫度 | 17-16 | 21-16 | 19-16 | 19-14 | 19-15 | 20-15 | 20-15 |
| 晚上天氣 | 多雲短暫雨 | 多雲短暫雨 | 陰短暫雨 | 多雲短暫雨 | 多雲 | 多雲 | 多雲 |
| 晚上溫度 | 16-15 | 17-14 | 17-14 | 16-14 | 17-15 | 18-15 | 17-15 |
Exercise Q3
利用R Markdown 製作《一周天氣預報》書面報告。
- 製作未來七天天氣預報圖
# Hint:
# 你可能需要ggplot2套件
# Mac顯示中文需設置字型
# http://equation85.github.io/blog/graph-font-of-r-in-mac-os-x/
# par(family='STHeiti')
Exercise A3
利用R Markdown 製作《一周天氣預報》書面報告。
- 製作未來七天天氣預報圖
library(ggplot2)
dat1 <- mutate(dat, 時間=paste(日期,早晚,sep="\n"))
dat2 <- select(dat1, 時間, 高溫, 低溫)
dat3 <- reshape2::melt(dat2)
ggplot(dat3, aes(x=時間, y=value, group=variable, colour=variable)) +
  geom_line() +
  labs(x="時間", y="溫度") +
  theme_gray(base_family="STHeiti") # 顯示中文字 Mac user only
Exercise
利用R Markdown 製作《一周天氣預報》書面報告。
Appendiex
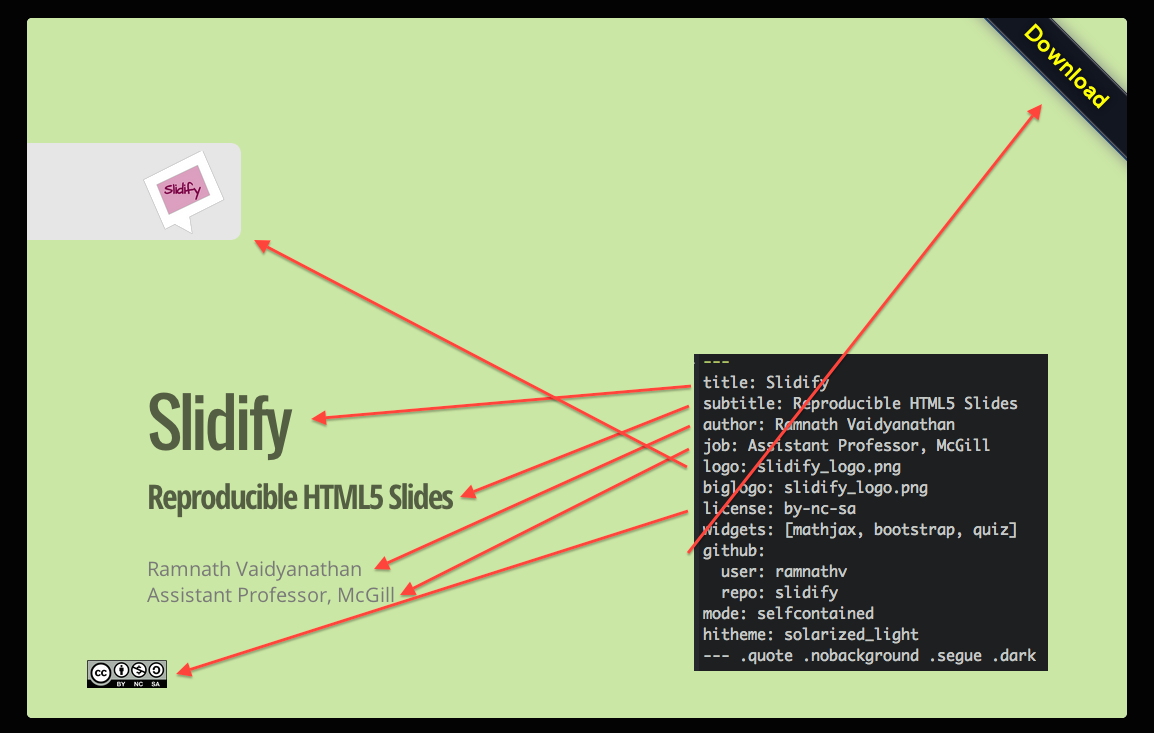
About Document Content
---
title: "Introduction to R Markdown"
author: "Lin"
date: "2016-06-30"
output: html_document
---
YAML metadata
Cover by Wush
Generate Markdown and HTML
```{r results='asis', echo=FALSE}
library(whisker)
temp = '<span class="{{color}}{{number}}">{{color}}{{number}}</span>'
numbers = c("", "2", "3")
colors = c("red", "blue", "green", "yellow", "gray")
for (color in colors){
    cat("- ")
    for (number in numbers){
        out = whisker.render(temp)
        cat(out)
    }
    cat("\n")
}
```
Some Useful HTML
Interactive Documents
It’s possible to embed a Shiny application within a document.
Publish to the web
Using R packages::slidify to publish your slides to the web
library(slidify)
publish_github("repo", username="user_name")
publish_rpubs("title","file_name.html")
publish_dropbox(dir_name)
publish_gist("title",file="file_name.html",publish=TRUE)
Publish to the web: Github
- sign up or login in Github.com at browser
- find button: New repository to add new one.
- select a name for repository, then created.
- the link of your new repository would be like:
https://github.com/"your_name"/"repo_name".git - find Settings in your profile at top-right corner
- select SSH Keys and add SSH Key
- upload your SSH key which created by your own PC/notebook.
- at RStudio, using Rcommand:
slidify::publish_github("repo_name", username="your_name") - your new page will be ready in 5~10 min and link:
https://"your_name".github.io/"repo_name"/index.html
Source
Wush 教學影片
Slidify簡介 by Wush Wu
https://www.youtube.com/watch?v=P97udK2ktuY
20121203 MLDM Monday:markdown + knitr (Hangout 轉播) by Wush Wu
https://www.youtube.com/watch?v=OHKZLeKlUsM